首先来看一下我怎么来学习Flutter,我要了解每一个组件,同时,这又是一个App,所以,我的目标是直接生产一个App,里面就是对Flutter组件的介绍,同时写上一些demo以及源代码,这一个点子源于React Native With Code这一款App,在我学习React Native的时候给予了我很大的帮助。如果要构建这样的一款App,我需要先构建一个App首页,包含了一个可以滚动的列表,如果可以,还可以添加一些其他的组件。以及基础的布局组件。
BuildContext
官方文档中说到: A handle to the location of a widget in the widget tree.。这是对BuildContext的解释,他就是字面意思就是:它是整个widget tree中的某一个widget的把手。既然有把手,那么就有位置了,所以说的高深一点就是对构建的所有窗口小部件的树结构中的窗口小部件的位置的引用。
一个 BuildContext 只属于一个小部件。所有你会看到每一个Dart文件中的每一个类都只会有一个BuildContext。
一般 BuildContext 是和 StateLessWidget 使用,下面的写法算得上是一个固定的写法
1 | class MyApp extends StateLessWidget { |
MaterialApp
MaterialApp是Google给我们封装好的一个UI库,如果要是有MaterialApp,我们需要在Dart文件的开头引用 import 'package:flutter/material.dart';
使用1
2
3
4
5
6
7
8
9
10class MyApp extends StateLessWidget {
// @override 验证 @override 下面的方法名是否是你父类中所有的,如果没有则报错
// build方法是StateLessWidget的构建方法,传递一个BuildContent暴露其在文档流中的位置
Widget build(BuildContext context){
return MaterialApp(
// 配置属性
)
}
}
属性
MaterialApp 的属性挺多的,不过常用的可能也就是 home , initialRoute 和 routes。 routes 就有点像react-router-dom,每一个route配置其对应的渲染页面。
下面是MaterialApp支持的属性1
2
3
4
5
6
7
8
9
10
11
12
13
14
15
16
17
18
19
20
21
22
23
24
25
26
27const MaterialApp({
Key key,
this.navigatorKey,
this.home,
this.routes = const <String, WidgetBuilder>{},
this.initialRoute,
this.onGenerateRoute,
this.onUnknownRoute,
this.navigatorObservers = const <NavigatorObserver>[],
this.builder,
this.title = '',
this.onGenerateTitle,
this.color,
this.theme,
this.darkTheme,
this.locale,
this.localizationsDelegates,
this.localeListResolutionCallback,
this.localeResolutionCallback,
this.supportedLocales = const <Locale>[Locale('en', 'US')],
this.debugShowMaterialGrid = false,
this.showPerformanceOverlay = false,
this.checkerboardRasterCacheImages = false,
this.checkerboardOffscreenLayers = false,
this.showSemanticsDebugger = false,
this.debugShowCheckedModeBanner = true,
})
1 | class MyApp extends StatelessWidget { |
Scaffold
Scaffold的中文意思是脚手架的意思,顾名思义,这个是一个可以快速帮我们构建一个App的脚手架,从而我们不需要自己动手去搭建页面的头部底部或者是右下角按钮等等。悄悄告诉你,其实MaterialApp等大多数Widget中的Child属性返回的都是一个Scaffold。
下面是Scaffold中的一些属性1
2
3
4
5
6
7
8
9
10
11
12
13
14
15
16
17
18
19const Scaffold({
Key key,
this.appBar, // 标题栏
this.body, // 内容
this.floatingActionButton, // 悬浮按钮
this.floatingActionButtonLocation, // 悬浮按钮位置
this.floatingActionButtonAnimator, // 悬浮按钮动画
this.persistentFooterButtons, // 底部持久化现实按钮
this.drawer, // 侧滑菜单 左侧
this.endDrawer, // 侧滑菜单 右侧
this.bottomNavigationBar, // 底部导航
this.bottomSheet,
this.backgroundColor, // 背景色
this.resizeToAvoidBottomPadding, //自动适应底部padding
this.resizeToAvoidBottomInset,
this.primary = true, // 使用App主色,App主色在 MaterialApp 中可以设置
this.drawerDragStartBehavior = DragStartBehavior.start, // 抽屉拖拽表现
this.extendBody = false,
})
因为Scaffold更多的相当于一个容器,主要的还是在于里面的内容,所以我们更多的是要去看看它里面的这些属性的用法,因为每一个属性我们都是需要单独的进行配置的。
AppBar
这个是可以创建一个App标题栏的Widget,也支持很多的属性1
2
3
4
5
6
7
8
9
10
11
12
13
14
15
16
17
18
19
20
21AppBar({
Key key,
this.leading, // 导航widget,一般就是标题栏左侧的返回键
this.automaticallyImplyLeading = true,
this.title, // 标题
this.actions, // 右侧附属,比如菜单或者是下拉
this.flexibleSpace,
this.bottom,
this.elevation,
this.shape,
this.backgroundColor,
this.brightness,
this.iconTheme,
this.actionsIconTheme,
this.textTheme,
this.primary = true,
this.centerTitle,
this.titleSpacing = NavigationToolbar.kMiddleSpacing,
this.toolbarOpacity = 1.0,
this.bottomOpacity = 1.0,
})
先来了解一下title和centerTitle属性,其余的我们可以在AppBar中详细的了解。
顾名思义,title就是标题的意思,centerTitle就是标题居中的意思。
Text
很简单,Text就是文本的意思,我们要显示的文本都是放在Text Widget中的。Text属性也有很多1
2
3
4
5
6
7
8
9
10
11
12
13
14const Text(
this.data, {
Key key,
this.style,
this.strutStyle,
this.textAlign,
this.textDirection,
this.locale,
this.softWrap,
this.overflow,
this.textScaleFactor,
this.maxLines,
this.semanticsLabel,
})
Container
Container是容器的意思,主要是负责容器的布局,有点类似HTML中的div标签,可以设置padding和margin。需要注意的是,在Flutter中,少数Widget才可以设置padding和margin,大部分Widget是不行的,所以如果要设置这些属性,我们需要使用Container进行包裹。而不是像HTML中一样,大部分都可以设置padding与margin
1 | Container({ |
部分代码展示1
2
3
4
5
6
7
8
9
10
11
12
13
14
15
16
17
18
19
20
21
22
23
24
25
26
27
28
29
30// 首页的ListView组件
import 'package:flutter/material.dart';
void main() => runApp(MaterialAppInfo());
class MaterialAppInfo extends StatelessWidget {
MaterialAppInfo({Key key, this.title}) : super(key: key);
final String title;
Widget build(BuildContext context){
return MaterialApp(
home: Scaffold(
appBar: AppBar(
title: Text(title),
),
body: Container(
// padding: const EdgeInsets.fromLTRB(20, 10, 20, 10),
child: RaisedButton(
onPressed: (){
Navigator.pop(context);
},
child: Text(
'踏浪'
),
),
),
)
);
}
}
ListView
因为首页我们要显示的是一个长列表,所以我们需要使用ListView,这个在Flutter是一个简单的列表组件,Flutter中还包含了其余的多种列表组件,这些以后再介绍。
ListView有三种创建方式,最简单的就是直接使用ListView1
2
3
4
5
6
7
8
9
10
11
12
13
14
15
16
17
18
19
20ListView(
padding: const EdgeInsets.all(8.0),
children: <Widget>[
Container(
height: 50,
color: Colors.amber[600],
child: const Center(child: Text('Entry A')),
),
Container(
height: 50,
color: Colors.amber[500],
child: const Center(child: Text('Entry B')),
),
Container(
height: 50,
color: Colors.amber[100],
child: const Center(child: Text('Entry C')),
),
],
)
因为使用了ListView Widget,接收的不在是一个简单的子元素而是一堆数据,使用是children属性而不再是child了。children接收的是一个<Widget>数组。这是最简单的,但是也是死的。
但是如我我们要进行动态的产生数据,那么就不能一个一个的写死,所以需要使用到ListView.builder。1
2
3
4
5
6
7
8
9
10
11
12
13
14final List<String> entries = <String>['A', 'B', 'C'];
final List<int> colorCodes = <int>[600, 500, 100];
ListView.builder(
padding: const EdgeInsets.all(8.0),
itemCount: entries.length,
itemBuilder: (BuildContext context, int index) {
return Container(
height: 50,
color: Colors.amber[colorCodes[index]],
child: Center(child: Text('Entry ${entries[index]}')),
);
}
);
itemCount属性是生成的数据条数,一般就是我们ajax请求的数据了。itemBuilder就是构建我们的每一条数据,需要return一个Widget。
ListView还有一个方法ListView.separated。与builder的区别就是他可以画一条分割线,使用这个方法必须给他设置一个separatorBuilder属性,否则会报错。
1 | final List<String> entries = <String>['A', 'B', 'C']; |
Navigator
最后就是关于路由的部分,来看看下面这张图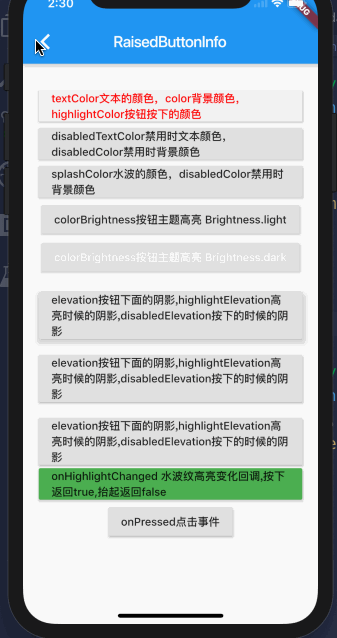
首页展示了列表,我们可以点击每一项进入到子页面,这个时候我们就需要使用到路由组件。
我们是点击,然后退出或是返回上一个页面,但是如果我们要添加点击事件,一般的组件还是不行的,需要使用Button才可以添加点击事件,却是没有web前端来的利索。我们这里使用了RaisedButton这个Widget1
2
3
4
5
6
7
8
9
10
11
12
13
14RaisedButton(
onPressed: (){
  Navigator.push(context, new MaterialPageRoute(
    builder: (context) => new MaterialAppInfo(title: text)
  ));
},
child: Text(
text,
style: TextStyle(
fontSize: 26,
color: Colors.blue
),
),
)
先来了解两个方法,push和pop。
push
推出下一个页面,使用方法就是1
2
3
4
5onPressed: (){
Navigator.push(context, new MaterialPageRoute(
builder: (context) => new MaterialAppInfo(title: text)
));
}
需要有两个参数,第一个参数context即可,可以理解为context关联上下文,和下一级页面关联起来,以便之后返回。第二个参数需要使用到new MaterialPageRoute调用一个组件,传递一个builder,这是一个函数,返回需要显示的组件即可。关于传值,就在返回的组件中传值即可。
pop
pop很简单1
2
3onPressed: (){
Navigator.pop(context);
}
直接使用即可。但是同样需要绑定在按钮Widget下面才可以。
使用固定的路由名
上面说到的路由其实只是Navigator的一种,还有一种就是使用固定的路由名,有点像react-router
中我们定义一个Router把所有的路由都放在里面
下面看看主入口文件main.dart1
2
3
4
5
6
7
8
9
10
11
12
13
14
15
16
17
18
19import 'package:flutter/material.dart';
import './home/index.dart';
import 'MaterialApp/index.dart';
// 主函数,入口函数
void main() => runApp(MyApp());
class MyApp extends StatelessWidget {
Widget build(BuildContext context){
return MaterialApp(
// title: "Learn Flutter",
routes: {
"materialAppInfo": (BuildContext context) => MaterialAppInfo(title: 'materialAppInfo')
},
home: HomeList()
);
}
}
代码中的routes就是路由,如果要跳转到MaterialAppInfo这个页面1
2
3onPressed: (){
Navigator.pushNamed(context, 'materialAppInfo');
},
使用Navigator.pushNamed方法,第二个参数就是我们需要跳转的路由。
补充说明(very important)
前文们提到了MaterialApp组件,这个组件其实一般就在main.dart中使用一次就可以了,因为如果在一个项目中使用了多次MaterialApp,同时你使用了固定路由配置,即routes配置路由,那么这个配置会以最后一个为参考,可能会出现不可控的错误。
子组件中,你如果首先想到的是时候MaterialApp,那么你可以考虑换成Scaffold或者其他的容器组件
end
上面就是关于搭建这样一个App需要了解的一些基本的Widget以及其属性,上面并没有涉及到全部的属性,这些属性我们将在介绍每一个Widget的时候在详细说明,还请持续关注本博客。